Showing posts with label Chocolate. Show all posts

Sunday, June 22, 2014

Soft-baked Chocolate M&M Cookies


It's the nephews' 4th and 7th birthday party. Off to a very adventurous party we went, with bouldering and rock wall-climbing activities slated for the morning. I toyed with the idea of spiderman cookies as with the nature of the party or ironman themed cookie pops as the boys love their action heroes. However, thought of all those coloured fondant that the kids will probably all gobble up happily, regardless of the preservatives and chemicals, puts me off. At least the adults usually know to remove these layers but to a gleeful kid, probably not. 

Decided upon M&Ms as the main cast then as I recalled the boys picking off all those chocolate candies on the cupcakes I baked for their last birthday. Off I went to bake a batch of soft doughy brown-sugar cookies with additional chunks of semi-sweet chocolate for a touch of gooey indulgence. 


These cookies from Sallys Baking Addictions are a breeze to bake. Not even needing a mixer, all it took was 2 bowls and probably 10 minutes to mix everything up. Chill for 2 hours and into the oven they went. The cookies stayed beautifully tall with the M&Ms dotting them prettily. Each tablespoon of dough spread into a regular Scotch tape size and has around 1cm of height to it. The crumb is soft and chewy, which crumbles into big pieces with a little pressure so eat these little gems carefully or you will be spilling and sweeping afterwards. 

I was also initially worried if little children will take to soft cookies as they are probably more used to store-bought crispy sweet cookies. To my delight, I see them biting into these pillowy rounds happily, reaching for 1 after 1 after 1. Caught my little nephew having 4! Hope it was not just the M&Ms he was going after though. 


I do prefer my cookies to have a crisp top though these cookies are probably not meant to have so I may bake them at a higher temperature for a shorter period of time the next I try these. Nonetheless, these are addictive and what was meant to be 65 pieces of servings at the party dwindled to 50 by the time we got there. 

Ingredients (Source)
2 1/4 cups AP Flour
1 Tsp Baking Soda
1 1/2 Tsp Cornstarch
1/2 Tsp seasalt
170g unsalted butter, melted
3/4  cup light brown sugar
1/4 cup white sugar
1 egg + 1 egg yolk
2 Tsp vanilla essence
100g chocolate chunks
100g M&M

Steps:
1. Sift flour, soda, cornstarch, seasalt together.
2. Melt the butter and in a large bowl, mix well with both sugars and egg/yolk and vanilla essence.
3. Mix flour mixture into the butter mixture in 2 addictions, mixing well each time but do not overwork the mixing. 
4. Mix in the chocolate chunks. 
5. Cover and chill the dough in the fridge for at least 2 hours.
6. Before baking, pre-heat oven to 150C top-bottom fan mode.
7. Let the dough relax at room temperature for 10 minutes.
8. Roll into 1 tablespoon-sized dough and press  3 to 4 M&Ms into surface of the dough. 
9. Bake for 12 minutes. Dough will have flatten slightly but remains relatively tall and chunky.
10. Let the cookies rest on tray for 10minutes before cooling. 
11. Eat 1 while it's still a little warm and sigh in satisfaction. 
12. Cool the rest completely and keep them in air-tight containers at room temperature. 

Try not to finish all at 1 go. Try very hard. It's that good. =)


Thursday, May 15, 2014

Dark Chocolate Orange Digestives


I'm a fan of Marks&Spencer, their food, especially their biscuit selection. Ever tried their shortbread fingers? Melt-in-your-mouth buttery goodness. Chocolate digestives? Creamy chocolate with a crunchy interior. You wouldn't stop at 1. Cranberry and Orange cookies? Best combination of sweet citrus and butter at the same time. Absolute Favourite. 

However, I'm also sure that all that butter and processed flour does no good to the thighs! When I chanced upon this whole wheat chocolate-covered digestives, the eyes lit up and the baking itch came on. It's been a while since my last bake as I eased into a new job. The inertia to start the whole measure-sift-mix-bake-and-wash process prolonged and weekend after weekend zoomed past. 


Thankfully, this is a really easy recipe, no need for heavy duty mixing nor massive clean up, its almost just a 2-bowl process! The bake took less than an hour to complete, excluding the cooling time. The resulting cookie was a healthy dose of goodness, tinged with bursts of orange peel and covered in a almost-bitter 70% dark chocolate coating. One cookie is sufficiently filling as a snack, and the crunch crunch crunch of the cookie is absolutely satiating. Love it and so did almost who tried. Gonna be a regular item on my bake list! 


Ingredient List:
1 cup whole wheat flour
1 1/3 cup rolled oats
1 tsp baking powder
1 pinch of salt
1/3 cup dark molasses
117g unsalted butter, cold and cubed
Orange Peel from 1 orange
2 tbspn milk 
220g 70% dark chocolate, melted


Pre-heat oven to 180C. 

Steps:
1. Process flour, oats, baking powder, salt and sugar in a food processor, or since I don't have one, in a blender. 
2. Pour into a large bowl, add the butter and orange peel and cut the butter into the mixture, until it resembles small bread crumbs. Do not over-handle or mix to the stage where the butter has melted from the warmth of the hands. 
3. Add the milk and form mixture into a slightly wet dough. Add more milk if necessary, it should just clump together but is not wet. 
4. Roll between 2 parchment paper and cut out desired shapes. 
5. Place cookie dough onto a paper-lined pan. I had 22 cookies from above portion. Chill in freezer for at least 10 minutes.
6. Bake for 20 to 22 minutes until edges turn slightly brown. 


7. Cool the cookies thoroughly. 
8. Melt the chocolate in a bowl over simmering hot water until smooth. 
9. Dip each cookie in the chocolate and let the chocolate coat harden at cool room temperature or in the fridge. 


I made the mistake of letting the chocolate harden completely on the chopsticks, in the fridge. The base of the chocolate coat harden over the chopsticks and when I pry them apart, some of the base broke, leaving spots of cookie peeking out on the base. 

Keep the cookies in the fridge and enjoy them over the next week. Delicious Goodness!

Thursday, January 30, 2014

Chocolate cupcakes with Mini Reese Cups


Do you have lots of chocolate left over from Christmas? And now that CNY is coming, I'm sure the stash of chocolate will just kept increasing! I need to finish my many little bags of chocolate, some of which are reaching almost 1 year in storage age. Out comes my favourite chocolate cupcake recipe again, this time with a milk chocolate buttercream frosting and with a whole mini Reese in the cupcake.  

The peanut butter chocolate added a sweet saltiness to the cupcake which was a pretty pleasant surprise to unknowing audience. I used milk chocolate as I thought the lighter colour of the frosting will go highlight the mini pink hearts better. The end result was that the overall frosting was a tad too sweet, compounded by hearts which are little bites of sugar on their own. So,  I probably should live with the darker colour of the dark chocolate frosting next time. 

On a side note, am super loving these rainbow cupcake liners. Colourful and cheerful, they make nice cupcake gifts to brighten any one's day!


Saturday, December 28, 2013

Christmas Log Cake


I usually do 1 log cake a year and this year is no exception. I made my first and only log cake order for X'mas and maaan, I intend to keep it that way. It's way too stressful trying to roll up the cake carefully and without cracking. My first cake broke totally into pieces as I was rolling it up, together with my heart! Rolled up my sleeves abit further, wiped my cold sweat and started all over again, with a different recipe though. This time I used a japanese recipe and I was a little hesitant at its call for baking at 200C. Phew, thankfully it turned out smooth, spongy and soft. After a short cool down period, I was able to roll up the cake slowly, steadily and with just 1 teeny weeny small crack that was easily sealed up by the ganache. Since it was for an order I didn't get to try the cake with the whole bananas wrapped in it but I did try the cut-away corners of the roll which I dipped generously in the chocolate ganache. I must say it's pretty good, soft and bouncy, with a hint of honey fragrance. Yum!


Swiss Roll Recipe:
Ingredients:
50g AP Flour
15g Cocoa Powder (I used Hershey's)
6 eggs, separated
100g sugar
30ml honey (I used Australia honey)
20g Unsalted butter
30ml milk (I used Meiji Skimmed Milk)

Oven temp 200C.

1. Sift the flour and cocoa powder together 3 times and set aside
2. Place the egg yolks, 40g sugar and honey into a mixer bowl and over a bain-marie, stirring constantly until the mixture is warm to the touch.
3. Immediately beat the yolk mixture until it turns creamy and pale. (Ribbon stage)
4. Set the yolk mixture aside and beat the egg white until frothy.
5. Add 60g sugar to the egg white and beat until stiff peaks.
6. Fold in half of the stiff egg white into the egg yolk mixture. Fold in all the sifted flour mix.
7. Add the remaining egg white and fold in lightly.
8. Warm the butter and milk in the microwave for 20seconds, add into the mixture and fold in completely, scooping from the bottom of the bowl to ensure a thorough mix. Be careful not to deflate the mixture.
9. Pour mixture into a rectangular pan lined with baking paper. (I used the pan that comes with the oven) Smooth the top and bake in pre-heated oven for 10 to 12 minutes. (mine took 11minutes) The top of the roll should not have a crust and feels bouncy to the touch.
10. Remove from oven and taking the roll from the pan, drop it onto the tabletop to release the steam and prevent a wet cake. Let the cake cool to almost room temperature.

Filling - I used a chocolate swiss meringue buttercream, refer here for the recipe, and 2 big ripe bananas.

Frosting - Chocolate Ganache
Bring 200ml thickened cream to almost a boil, where there are little bubbles but it has not reached a boiling state. Immediately pour this over 200g chopped dark chocolate pieces and stir until it has become a thick chocolate liquid mix. Let it cool until it's just warm, stir occasionally so that the surface would not harden.

Assembly:
1. Flip the cake so that its facing top-down on a new piece of parchment paper. Remove the parchment paper from the bottom of the cake and gently roll the cake up without squeezing it too tight.
2. Unroll the cake and spread the chocolate swiss meringue buttercream evenly across the cake (the bottom side which is now the side facing up). Place the whole bananas across the length of the cake and roll up the cake again, making it tight this time. Ensure that the cake sits on the sealed part.
3. Place the cake into the fridge to set for an hour.
4. Remove from the fridge, and place parchment paper around the exposed cake board to collect spillover frosting. Cut away a small section from the 2 ends of the cake to make it even at the sides.
5. Pour the ganache generously across the whole roll, covering every part of the cake. Cut out 1 section from one of the ends to create the broken log effect and place this side-ways up on top of the cake. Cover this section and the 2 ends of the roll with more ganache. Place X'mas decor as desired and place it back in the fridge to chill.
6. Once the ganache has set on the cake and is pretty stiff, use a fork to draw little lines across the whole log to create the bark look.
7. Serve slightly chilled but not straight cold from the fridge. (This is to ensure the cake has soften slightly)

Submitting this to:
"Baby Sumo's Christmas Recipes Collection 2013", hosted by Baby Sumo of Eat Your Heart Out
and 
"Bake Along", hosted by Joyce from Kitchen Flavours, Lena from Frozen Wings and Zoe from Bake For Happy Kids. 


Wednesday, December 18, 2013

Chocolate Banana Pictorial Guide

Chocolate Banana is a popular choice for birthday celebrations. It looks like the pairing of sweet ripe bananas and a moist dense chocolate cake is good for all ages. Since I've started selling my bakes in late October, this is by far my most ordered cake or cupcakes! Like to really thank everyone for the support by providing a pictorial guide to assembling this cake. You can use this as a loose guide in making a lovely cake for your loved ones and you could also use your own favorite chocolate cake and frosting recipes.

Step 1 -Bake the cakes

I used my favourite chocolate cake recipe, from the Pioneer Woman! It's an easy, fuss-free recipe, I will usually also whip up a batch of cupcakes, everyone loves a hidden banana, not so hidden now but will be covered by a frosting swirl later. 


Chocolate Cake
Ingredients:
227g unsalted butter
4 heaped tablespoons cocoa powder
1 cup boiling water
2 cups All-Purpose flour
11/2 cups fine-grained white sugar (300g)
1/4 teaspoon fine seasalt
165ml buttermilk (Which I sub for 150ml Meiji Milk and 15ml of lemon juice, let stand for 10minutes)
2 large eggs
1 teaspoon baking soda
1 teaspoon vanilla essence

Pre-heat oven to 175C, top-bottom.

Steps:
1. Melt the butter in a large saucepan over medium fire. Swirl it constantly, until it reaches a slightly browned stage.
2. Add the cocoa powder and let it melt within the butter. This would start to look very thick.
3. Add the boiling water and stir to combine. Let it come to a boil and boil for about 30seconds. Remove from the heat and let it cool slightly while you prepare the rest of the ingredients.
4. In a large bowl, combine the flour, sugar and salt and whisk to combine and aerate it slightly.
5. In a measuring cup, measure out the buttermilk, add the eggs and vanilla essence, stir to combine.
6. Add the cocoa mixture to the flour mixture, stirring quickly and thoroughly to let it come together into a  thick, sticky paste.
7. Add the baking soda to the buttermilk mixture, stir briefly and pour everything into the cocoa-flour paste. Stir vigorously to combine the mixtures and it will become a pretty liquid batter.
8.1. For cupcakes, spoon them into cupcakes cases, drop a sliced banana chunk into each cup if you'd like and bake them for 18 to 19 minutes, turning the pan around at 13 minutes.

8.2. For whole cakes, I prefer to do 1.25 portion of above recipe, divide them equally into 2 lined 8-inch pans, and baked for 40 minutes. I've tried 1 portion and 1.5 portion size before, I find 1.25x just the right height after slicing off the slight domed top.

It's a very tender cake, so cool them totally before removing it from the pan and be very careful at it or they may break into pieces.

Step 2 -Level the top of the cakes

I used 6 satay sticks and stick them in all around the cake at an even height from the bottom up. Place a serrated knife on 2 sticks at a time and gently slice into the cake, moving from stick to stick until the cake has been sliced in round the circumference. Remove all the sticks if they had not already fallen out by now, and slice through the center. Remove the sliced tops and go ahead, eat 'em all up, they are frequently the best parts of a cake!


Step 3 - Make Butterscotch Sauce and Cook the Bananas

This step is pretty optional. You can just use riped, sliced bananas and sandwich the cake layers together with the frosting of your choice. I like to use butterscotch sauce as it lends a buttery fragrance to the bananas which also releases their aroma upon cooking. The sauce is also thick and sticky enough to act as the glue between the cake layers. 


I usually use a large plate which is similar to the size of the cake and cut enough bananas to cover the plate as an estimate for the amount of banana slices needed. Note that they will shrink a little upon cooking so do have some extra on hand. They turned a beautiful bright yellow after cooking.

Butterscotch sauce:
180g thickened cream
160g brown sugar
150g unsalted butter
1 tsp vanilla extract
1/2 teaspoon sea salt

Place all ingredients in a pot and bring to boil. Simmer at low heat for around 5 minutes, constantly stirring the mixture until it thickens. 


This will make a large batch. Leave enough sauce in the pan to cover the amount of sliced bananas (Approx. half cup) and keep the rest in a jar to cool and keep for up to 2 weeks in the fridge. Place thickly-cut bananas into the sauce and simmer, flip over, simmer until the bananas just turned slightly soft. This should take a couple of minutes only. Do not cook them for very long or they may become too mushy. 

Step 4 - Sandwich the cake layers with the butterscotch bananas. 

Place 1 cake layer on the actual serving cake board, leveled side facing upwards. Arrange the cooked banana slices on top, placing them close together so every bite yields a large mouth of bananas. 


Next, drizzle the remaining sauce over the bananas. 


Lastly, place the 2nd cake layer, bottom facing up onto the banana slices. Press the cake down firmly to stick it to the sauce. 


Now, leave the cake in the fridge for the butterscotch and bananas to cool and the cakes to stick together. Ooh look at how the sauce dripped and pooled. A sticky sweet mess. 


Step 5 - Frost the cake with Chocolate Swiss Meringue Buttercream (SMB)

Once the cake has sat in the fridge for around 1 hour which will have the cake layers and bananas stuck together quite nicely, the frosting can go on. I always try to make a large batch of SMB so that whenever I need them, I take the amount needed from the freezer, defrost in the fridge overnight and whip to a smooth cream before using. 1 batch of SMB (5 egg white) can make around 2 8-inch or 40 cupcakes. However, if the middle of the cake uses SMB instead of butterscotch, then 5 egg white would only be enough for 1 cake with a little left over. 

Chocolate Swiss Meringue Buttercream 
5 large egg whites
250g granulated sugar
340g unsalted butter, softened and cut into cubes
2 teaspoons vanilla bean paste or essence
pinch of salt
200g melted and cool dark chocolate

Steps:
1. Place egg whites and sugar in a clean and dry metal mixer bowl, and simmer over a pot of water (not boiling), whisking constantly but gently until the sugar has completely dissolved and the egg whites are hot.
2. Using the whisk attachment of mixer, immediately start whipping until the meringue is thick and glossy. The mixture should be at room temperature by now (It may take around 10 minutes)
3. Switch over to paddle attachment and on low speed, start to add butter cubes gradually, and mix until it has reached a silky smooth texture. Add vanilla, salt and melted chocolate. Continue to beat on low speed until well combined.


Before frosting the cake, do place little pieces of aluminium foil or baking paper beneath the cake, just slightly tuck them under the circumference of the cake and make sure it covers the cake board. This is so that any excess cream will drop onto the foil and can be easily pulled out after the cake is frosted, leaving the cake board clean. I find that easier than trying to wipe the board clean thereafter which still usually leaves it looking oily. (Note: do not use kitchen towels as they get soaked and sticks under the cake.. you don't want guests biting into pieces of leftover kitchen towel! eeeui)

Place the cakes on a turntable (Ikea has the best reasonably-priced ones, at $19.90 and is a good size!) and frost away! For a good video tutorial, check out my absolute favourite lady "Sweetapolita.com". She's superb with frosting and has so many good and creative ideas! I've used a number of her recipes and they have all been easy to follow, with good results. 

Once done, leave the cake in the fridge again to set for another hour. 

Step 6 - Finishing Chocolate Glaze

Before putting on the final touch to the cake, start by placing the whole cake in the freezer. As the chocolate glaze has to be slightly warm to be pourable, the cake has to be frozen so that the buttercream would not melt on contact with the glaze. For cupcakes, I will freeze them for 15 minutes and for whole cakes, half an hour at least. Meanwhile, make the glaze!

Chocolate Glaze:

Ingredients:
50g dark chocolate, chopped into pieces (I used 70% cocoa)
100ml heavy cream

Steps:
1. Simply melt the dark chocolate and cream together in a bowl set over simmering water. Do not let any water or vapor get into this mixture. 
2. Cool slightly to a temperature just warm to the touch and use immediately.  
3. Pour the glaze generously over the top of the cake until they reach the circumference and gently nudge the glaze so that it glides over the side. 
4. Place it back into the fridge to set for the last time, until time to serve. 

It's best to remove the cake from the fridge for around 20 minutes to let the buttercream and cake soften a little as they can be a little hard when too cold. 


Wednesday, October 30, 2013

Kit Kat Chocolate Cupcakes

Yummy Pioneer Woman Chocolate Cupcake recipe again
Black Kit Kat Cupcakes with  Dark Chocolate Buttercream

Ready for frosting - Cupcakes baked with Kit Kat

Friday, October 25, 2013

Pioneer Woman's Chocolate Sheet Cake in cupcakes again!

Yay my first cupcake bake sale happened! A very nice and trusting friend got me to bake cupcakes for her twins' birthday celebration. Using my go-to chocolate cupcakes recipe now, by the Pioneer Woman, I made chocolate cupcakes, frosted with a choice of peanut butter or chocolate buttercream, topped with a dark chocolate glaze and adorned with a chocolate piece. Yum Yum. 

Recipe can be found at :
Cupcake:
Swiss Meringue Buttercream:
Chocolate Glaze:


Tuesday, October 15, 2013

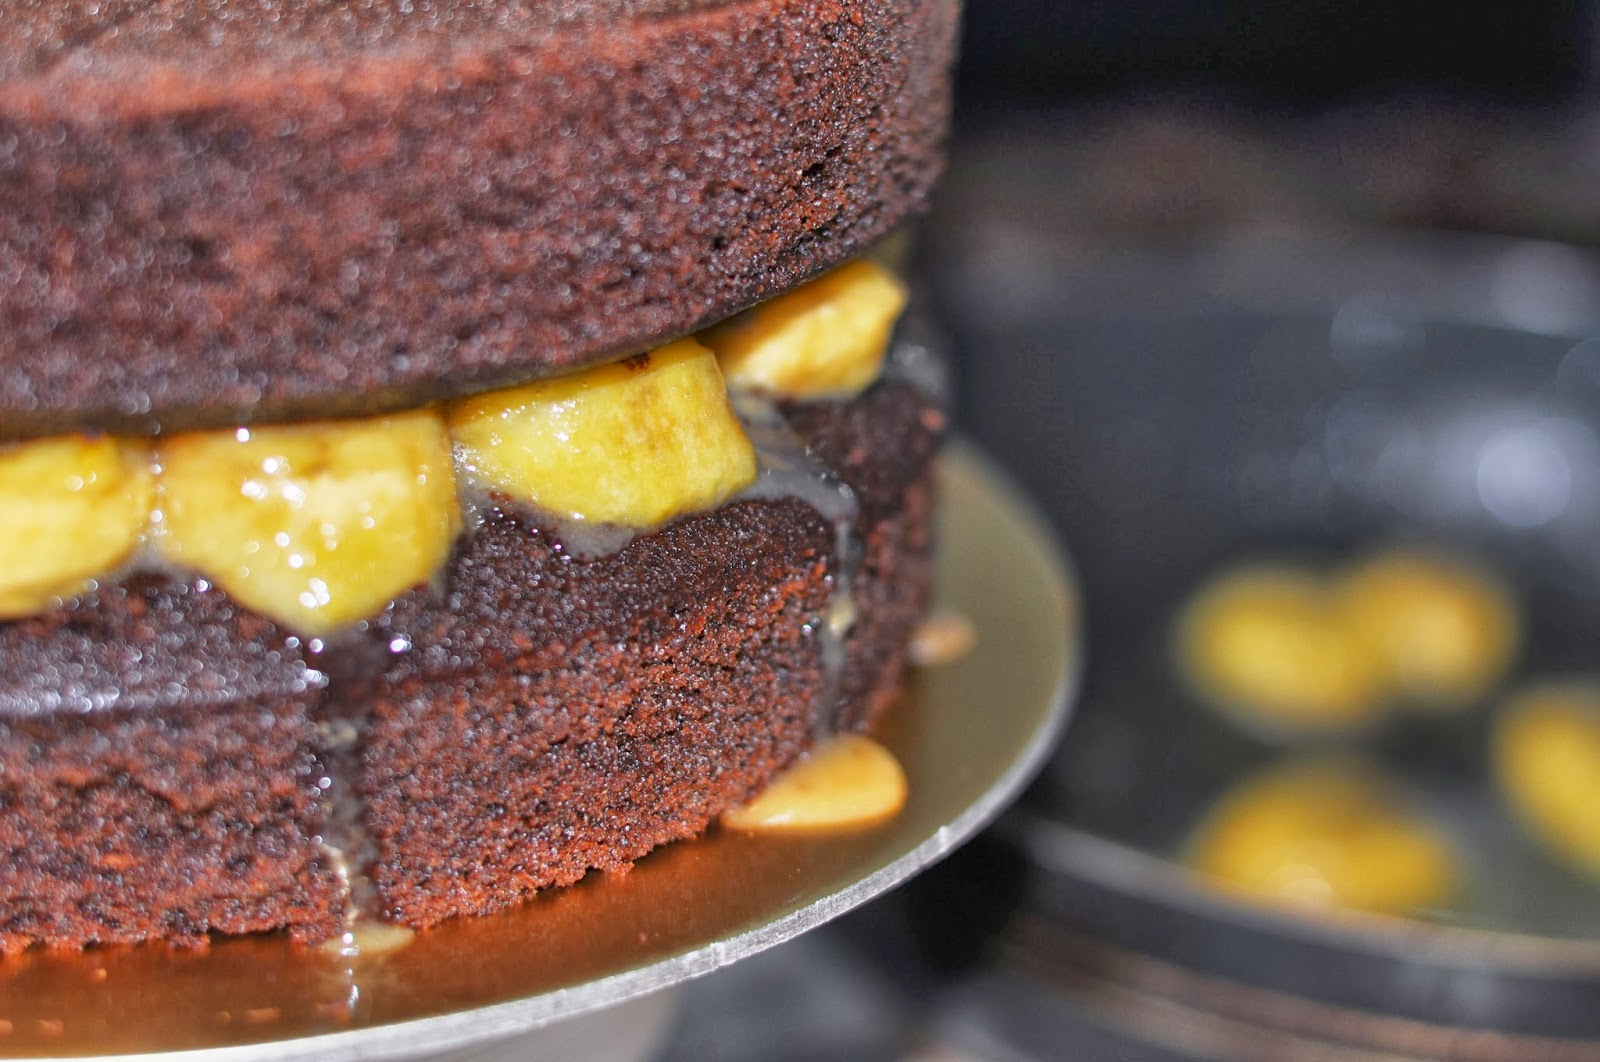
Decadent Triple Chocolate - Banana Caramel Fudge Cake

When you combine chocolate and banana, you generally want a sweet and probably dense cake. Something that will melt in your mouth amidst a flurry of flavors, a sweet treat cloaked in decadence, a piece that warrants 20 minutes in the gym. At least, that's what I would love, 2 layers of fat fudgy cake, sandwiched with thick bananas cooked in a caramel sauce, coated with a sinful chocolate buttercream and finally, glazed with coat of dark chocolate sauce. Apparently, my friends love them too!

Chocolate Fudge Cake (2 tall 6 inch layers)
Ingredients:
200ml heavy cream
40ml apple cider vinegar
250g cake flour
120g cocoa powder (I used a mix of Valrhona and Lindt)
1 teaspoon (heaped) salt 
1 teaspoon (flat) baking soda
1 teaspoon (flat) baking powder
250g brown sugar
60g unsalted butter, melted and cool 
60g plain thick yogurt
1 cup hot water
2 teaspoon vanilla extract
3 large eggs, lightly beaten

Oven Temp: 175C.

Steps:
1. Combine heavy cream and apple cider vinegar and stir together. It will become very creamy. 
2. Combine all dry ingredients together in a mixing bowl and whisk to combine thoroughly.
3. Add all liquid ingredients except the eggs and beat at medium speed  until just combined. Add the eggs and beat for another 2 minutes. 
4. Pour into 2 lined 6-inch pans (for tall layers) or 2 lined 8-inch pans (for shorter layers). 
5. Bake for 50 minutes until skewer test shows only a few moist crumbs and no batter on the stick. 
Notes: The batter is in liquid form so wrap the lined baking tins with an exterior layer of aluminium foil to prevent leakage.

Additional note:
1.5x the recipe above to make 2 tall 8-inch layers, bake for 55 to 60min. (More suitable as a birthday cake size)


Sauteed Banana in Caramel sauce
Ingredients:
2 large or 3 medium bananas, sliced into thick pieces
1/2 cup heavy cream
1/4 cup brown sugar
50g unsalted butter
1 teaspoon vanilla bean paste

Steps:
1. In a large pan, place heavy cream, brown sugar and butter together and melt over medium heat. 
2. Once melted, mix in the vanilla bean paste. 
3. Place sliced bananas into the pan and cook over medium fire. Swirl the pan gently to cook the bananas in the sauce for 2 to 3 minutes, until bananas softened slightly and has absorbed the flavor of the caramel. 
Note: After using the bananas and some of the sauce, there will still be leftover sauce. Cool to room temperature and keep in refrigerator for future use.


Chocolate Swiss Meringue Buttercream 
5 large egg whites
250g granulated sugar
340g unsalted butter, softened and cut into cubes
2 teaspoons vanilla bean paste or essence
pinch of salt
200g melted and cool dark chocolate

Steps:
1. Place egg whites and sugar in a clean and dry metal mixer bowl, and simmer over a pot of water (not boiling), whisking constantly but gently until the sugar has completely dissolved and the egg whites are hot.
2. Using the whisk attachment of mixer, immediately start whipping until the meringue is thick and glossy. The mixture should be at room temperature by now (It may take around 10 minutes)
3. Switch over to paddle attachment and on low speed, start to add butter cubes gradually, and mix until it has reached a silky smooth texture. Add vanilla, salt and melted chocolate. Continue to beat on low speed until well combined.

Chocolate Glaze 
Ingredients:
50g dark chocolate, chopped into pieces (I used 70% cocoa)
100ml heavy cream

Steps:
Simply melt the dark chocolate and cream together in a bowl set over simmering water. Do not let any water or vapor get into this mixture. Cool slightly to a temperature just warm to the touch and use immediately.  

Assembly
1. Slice off the top of the cooled cake layers to create a flat top on each. 
2. Place 1 layer (bottom facing down) on a serving plate, arrange cooked sliced bananas on the top, pour some sauce over the bananas and place the 2nd layer of cake (bottom facing up) on top. 
3. Place cake in the fridge to chill for an hour or when the cake is no longer warm with the banana caramel. 
4. Frost cake with buttercream and chill for another hour or when the buttercream is cold and set. 
5. Pour chocolate glaze over the top and nudge the sides to let some sauce flow over the edges. 
Note: Freeze the cake for 15 minutes before pouring the chocolate glaze over. This will prevent the buttercream from melting from the slightly warm glaze. 
6. Place back in fridge. Remove cake from refrigerator for 20 to 30 minutes before serving as cake will be too dense and heavy if eaten chilled from the fridge directly. 


Sunday, October 13, 2013

Fudgy Egg Yolk Brownie

 Do you make alot of frosting? I do that on quite a few occasions and my to-go recipe is always the Swiss-Meringue Buttercream from Sweetapolita. I use egg whites on a almost weekly basis and end up with plenty of egg yolks in the fridge. Therefore, I'm always scratching my head and googling for egg yolk recipes. There are a number of them online and Food and Family has a good list of egg yolk recipes, ranging from 1 to many many yolks needed. Went through this list many times, many are for sauces, creams, curds, ice creams etc, foods that are not often used in our mainly-Asian cooking households. Tried a couple of the cake recipes, sponge and pound cakes but found them a little dry for my liking.

Today is my brother's birthday. He doesn't want a cake.. that's the usual boy attitude, isn't it? So, I suggested ice cream instead. He wants strawberry but his kids, my nephews, like chocolate. My nieces love brownies. I have 5 egg yolks in the fridge. Brain Wave - googled for "Egg Yolk Brownies". Woo hoo! Found 1 very quickly, that asked for 10 egg yolks. Double yay! Now I know what to make next time when I've plenty of yolks. I've just have to go buy strawberry ice cream later to go with the yummy brownies!

Brownies are typically easy 1 bowl recipes. Easy to make, quick to bake, this recipe is no exception. I halved the recipe, stir everything up and used a loaf pan. My dad and brother also loves Kit Kat so I added a layer of these milk fingers in the middle of the thick batter. Baked them for 30 minutes and they are done in the middle but the top is not too crispy yet. Don't dare to bake it any longer as original recipe calls for 40 minutes in a 8 by 8 inch pan, and the last thing you want is an over-baked and dry brownie. I shall lower the temperature next time so I can bake it longer to achieve a more crisp top.

The bake turned out really wonderfully fudgy, with a almost-black almost-molten center. The top lack the crisp but the flavor of the brownie is great, not very sweet and screams of chocolate. The Kit Kat inside was a tad soggy, and kind of distracts attention from the brownie; will skip that next time.The kids love it though, yay!


Adapted Recipe (Source)
170g dark chocolate, chopped into small pieces
55ml heavy cream + 35ml  heavy cream
140g brown sugar
5 egg yolks
1 teaspoon vanilla essence
95g cake flour

Oven temp 180g

Steps:
1. Melt dark chocolate and heavy cream together in a medium or large heat-resistant bowl over simmering water, not boiling. (Do not let water get into the chocolate mixture)
2. Stir the sugar in and let it cool to room temperature.
3. Stir in the yolks and vanilla essence, then the last 35ml heavy cream.
4. Fold in the cake flour. (It is a very thick batter)
5. Scoop half the batter into a lined loaf pan (or 8inch square pan if you double above recipe), line a layer of kit kat fingers and spread the remaining batter on top.
6. Bake for 30 minutes, turning the pan half way through the bake. It's done when the test stick comes out with a few moist crumbs.