Showing posts with label Frosting. Show all posts

Friday, June 13, 2014

Vanilla Bean Cupcakes with Salted Caramel Filling


On a trip to PasarBella one day, I found really reasonably-priced vanilla pods. 4 for $8.90 (I seem to recall) I grabbed, without really know what I would do with them. It has then been on my mind to try a vanilla bean cupcake. Everyone needs a basic cupcake recipe. I've my go-to recipe for chocolate cupcakes from ThePioneerWoman. My favourite fruit-based cupcake is definitely the Hummingbird or the Sticky Date. Now and then, I like a banana walnut muffin. Guess it's time I venture into the realm of a classic vanilla cupcake. Hopefully one that is soft, light and slightly crumbly yet moist. 

Google for vanilla cupcakes and many versions of "the Best vanilla cupcake" & "the Perfect Vanilla cupcake" popped up. Taste is subjective after all. I supposed I would have to test out a few recipes like I did for my chocolate cuppies. Decided on the recipe by My Baking Addiction. She has many cupcake recipes under her belt and all looks great! In addition, hers is one of the few recipes that uses seeds from vanilla pod. Being a newbie to this pod and vanilla business, I decided to go safe and chose that I can follow, rather than use my own judgement. This is also a white cake recipe which means it omits egg yolks and I've seen many recipes using white cakes which seem to give a lighter and fluffier crumb. 


Took the recipe, did accordingly except to reduce the sugar content as with all US/European recipes I follow as those tend to be too sweet for the typical asian palate (or could be just me!). Then, I brought the remaining of my salted caramel sauce to room temperature and spooned a teaspoon of it into each cupcake, cover back the cup cap and frosted with a vanilla bean SMB. The cake is slightly on the dry and tough side; I wonder if it's the reduced sugar content. Though the salted caramel made up for the dry cake, I would still prefer a softer crumb with more moisture on its own. It could be me baking this for the first time or could be the reduced sugar. May try again by increasing the milk or egg next time. However, the whole flavour combination went quite well, with the salted caramel adding a sweetness to the light and fragrant with vanilla seeds buttercream. Probably worth another try!

Vanilla Bean White Cupcakes (from my baking addiction. Make around 20 cupcakes)
2.25cups cake flour
1 tablespoon baking powder
1/2 teaspoon seasalt
1.25 cup milk, room temp
4 egg white, room temp
113g unsalted butter
1 cup sugar
seeds from 1 vanilla bean
2 teaspoon vanilla essence

Steps: 
1. Beat softened butter with sugar and vanilla bean seeds until light and fluffy. 
2. Add in vanilla extract and beat till combined
3. Sift flour, baking powder and salt together. Add 1/3 to the butter mixture and beat on medium speed.
4. Whisk together sugar and egg whites. Add 1/2 to the mixture and beat on medium speed. 
5. Beat in half of remaining flour mix, then milk mix. 
6. Add the last flour mix and continue to bear. Add the last of the milk mixture and beat until combined. Increase speed to high and beat for 3 minutes. 
7. Pour into cupcake holders and bake at 180C for 22 minutes. 
8. Cool thoroughly.


Salted Caramel Filling (from Kelsey Nixon)
1 cup sugar
1/4 cup water
3/4 cup heavy cream
50g unsalted butter
1 teaspoon sea salt

Steps:
1. Combine sugar and water in a saucepan or pot.
2. Keep mixture on low heat until sugar is dissolved.
3. Bring to a boil, do not stir.
4. Boil until the mixture turns amber (for around 5minutes)
5. Remove from heat and whisk in the heavy cream. Be careful of sputters. 
6. Stir in the butter then the salt.
7. Cool to room temperature before keeping. 
Note: This will make a large portion. Keep the rest in the fridge up to 2 weeks and bring to room temperature or re-heat before using.

Vanilla Bean Swiss Meringue Buttercream (from Sweetapolita)
5 large egg whites250g granulated sugar340g unsalted butter, softened and cut into cubes1 teaspoons vanilla bean paste or essenceseeds from 1 vanilla podpinch of salt
Note: You will probably use less than half of this portion. Keep the rest in the fridge for 1 week or freezer for up to 1 month. Remove from fridge and rewhip with paddle attachment to make it smooth before using again.

Steps:1. Place egg whites and sugar in a clean and dry metal mixer bowl, and simmer over a pot of water (not boiling), whisking constantly but gently until the sugar has completely dissolved and the egg whites are hot.
2. Using the whisk attachment of mixer, immediately start whipping until the meringue is thick and glossy. The mixture should be at room temperature by now (It may take around 10 minutes)
3. Switch over to paddle attachment and on low speed, start to add butter cubes gradually, and mix until it has reached a silky smooth texture. Add vanilla, salt, and seeds from vanilla bean. Continue to beat on low speed until well combined.

Assembly:
1. Cut a small hold on top of cupcake, dig out some of the cupcake crumbs, insert a dollop of salted caramel.
2. Frost with vanilla bean swisss meringue buttercream.
3. Serve at room temperature so that the salted caramel oozes and is not a chilled ball.


Saturday, December 28, 2013

Christmas Log Cake


I usually do 1 log cake a year and this year is no exception. I made my first and only log cake order for X'mas and maaan, I intend to keep it that way. It's way too stressful trying to roll up the cake carefully and without cracking. My first cake broke totally into pieces as I was rolling it up, together with my heart! Rolled up my sleeves abit further, wiped my cold sweat and started all over again, with a different recipe though. This time I used a japanese recipe and I was a little hesitant at its call for baking at 200C. Phew, thankfully it turned out smooth, spongy and soft. After a short cool down period, I was able to roll up the cake slowly, steadily and with just 1 teeny weeny small crack that was easily sealed up by the ganache. Since it was for an order I didn't get to try the cake with the whole bananas wrapped in it but I did try the cut-away corners of the roll which I dipped generously in the chocolate ganache. I must say it's pretty good, soft and bouncy, with a hint of honey fragrance. Yum!


Swiss Roll Recipe:
Ingredients:
50g AP Flour
15g Cocoa Powder (I used Hershey's)
6 eggs, separated
100g sugar
30ml honey (I used Australia honey)
20g Unsalted butter
30ml milk (I used Meiji Skimmed Milk)

Oven temp 200C.

1. Sift the flour and cocoa powder together 3 times and set aside
2. Place the egg yolks, 40g sugar and honey into a mixer bowl and over a bain-marie, stirring constantly until the mixture is warm to the touch.
3. Immediately beat the yolk mixture until it turns creamy and pale. (Ribbon stage)
4. Set the yolk mixture aside and beat the egg white until frothy.
5. Add 60g sugar to the egg white and beat until stiff peaks.
6. Fold in half of the stiff egg white into the egg yolk mixture. Fold in all the sifted flour mix.
7. Add the remaining egg white and fold in lightly.
8. Warm the butter and milk in the microwave for 20seconds, add into the mixture and fold in completely, scooping from the bottom of the bowl to ensure a thorough mix. Be careful not to deflate the mixture.
9. Pour mixture into a rectangular pan lined with baking paper. (I used the pan that comes with the oven) Smooth the top and bake in pre-heated oven for 10 to 12 minutes. (mine took 11minutes) The top of the roll should not have a crust and feels bouncy to the touch.
10. Remove from oven and taking the roll from the pan, drop it onto the tabletop to release the steam and prevent a wet cake. Let the cake cool to almost room temperature.

Filling - I used a chocolate swiss meringue buttercream, refer here for the recipe, and 2 big ripe bananas.

Frosting - Chocolate Ganache
Bring 200ml thickened cream to almost a boil, where there are little bubbles but it has not reached a boiling state. Immediately pour this over 200g chopped dark chocolate pieces and stir until it has become a thick chocolate liquid mix. Let it cool until it's just warm, stir occasionally so that the surface would not harden.

Assembly:
1. Flip the cake so that its facing top-down on a new piece of parchment paper. Remove the parchment paper from the bottom of the cake and gently roll the cake up without squeezing it too tight.
2. Unroll the cake and spread the chocolate swiss meringue buttercream evenly across the cake (the bottom side which is now the side facing up). Place the whole bananas across the length of the cake and roll up the cake again, making it tight this time. Ensure that the cake sits on the sealed part.
3. Place the cake into the fridge to set for an hour.
4. Remove from the fridge, and place parchment paper around the exposed cake board to collect spillover frosting. Cut away a small section from the 2 ends of the cake to make it even at the sides.
5. Pour the ganache generously across the whole roll, covering every part of the cake. Cut out 1 section from one of the ends to create the broken log effect and place this side-ways up on top of the cake. Cover this section and the 2 ends of the roll with more ganache. Place X'mas decor as desired and place it back in the fridge to chill.
6. Once the ganache has set on the cake and is pretty stiff, use a fork to draw little lines across the whole log to create the bark look.
7. Serve slightly chilled but not straight cold from the fridge. (This is to ensure the cake has soften slightly)

Submitting this to:
"Baby Sumo's Christmas Recipes Collection 2013", hosted by Baby Sumo of Eat Your Heart Out
and 
"Bake Along", hosted by Joyce from Kitchen Flavours, Lena from Frozen Wings and Zoe from Bake For Happy Kids. 


Thursday, December 19, 2013

Swiss Meringue Buttercream Cheese - finally a pipe-able batch!


Cream Cheese Frosting! How many of you are like me? I surfed countless recipes, tried many times and tasted plenty, in the search for a tasty one that can hold swirls. The cream-cheese-butter-icing sugar recipes usually turned out pretty good for frosting and are able to hold with lots of icing sugar incorporated but are way too sweet for my liking. From various feedback, I gathered that Swiss Meringue Buttercream is well-liked for it's lightness and satiny mouth-feel.

I've done it twice before, it's indeed tasty but was a little slippery to work with. I find it easy to frost cakes with it but they are not stiff enough to hold shape. Today, I whipped up yet another batch of Swiss Meringue Buttercream Cheese (SMBC), however I made a big booboo. I did not let the cream cheese soften and didn't whip the cheese sufficiently before I added the buttercream. The end result was a frosting that had little icky bits of cream cheese. Eui, not nice on the palate. Darn, I had 300g of cream cheese and 600g of SMB in it! All wasted. So I went to Mr. Google on "how to save a lumpy cream cheese frosting" and that's how I knew I made the 2 big mistakes. Most remedies call for microwaving the SMBC for 10s then rewhipping. I tried, microwaved, whipped, chill, didn't work. I tried again, microwaved longer, whipped, chill, turned into ab absolute goopy mess. Thats when I concluded that I tried but failed. Tough work. 900g of frosting went into the trash.

But, the blessing in disguise came! While waiting for my 2nd batch of cream cheese to soften at room temperature, I left my SMB in the fridge to chill. As I later whipped the cream cheese till the cows came home, scrapping down and whipping repeatedly till it's smooth, I added the cold SMB bit by bit till the CC and SMB are just incorporated together. That's when I realised to my pleasant surprise that the peaks held. Wow, I think the cold SMB could be one of the key factors. The other factor could be that lower proportion of cream cheese to SMB. In my previous attempts, I used 70 to 80% ratio of CC to SMB, this time I used only 50%. The cream cheese taste is still pretty significant, enhanced further by a tablespoon of lemon juice.  So 2 factors that changed my frosting from a creamy but slightly droopy frosting to a light and stiff buttercream that can be piped, were the cold buttercream and the lower proportion of cream cheese. I may try 60% CC to SMB next time, just to see if there's any significant difference in taste and texture.

Meanwhile, go make yourself a cake that needs that Swiss Meringue Buttercream Cheese!


SMBC: (Makes around 750g SMB)
5 large egg whites
250g granulated sugar
340g unsalted butter, softened and cut into cubes
2 teaspoons vanilla bean paste or essence
pinch of salt
375g cream cheese, cubed and at room temperature

Steps:
1. Place egg whites and sugar in a clean and dry metal mixer bowl, and simmer over a pot of water (not boiling), whisking constantly but gently until the sugar has completely dissolved and the egg whites are hot.
2. Using the whisk attachment of mixer, immediately start whipping until the meringue is thick and glossy. The mixture should be at room temperature by now (It may take around 10 minutes)
3. Switch over to paddle attachment and on low speed, start to add butter cubes gradually, and mix until it has reached a silky smooth texture. Add vanilla and salt.  Continue to beat on low speed until well combined.
4. Move the SMB to another bowl and keep that in the fridge. 
5. In the mixer bowl, paddle-whip the soft cream cheese till it's light and smooth. Took around 15 minutes of high speed paddling and lots of scrapping down the bowl. 
6. Add bits of the cold buttercream to the whipped cream cheese on med-low speed until it's just incorporated. Add a tablespoon of lemon juice, paddle-whip at med-high speed for a short while to let it come together. TaDa! It's now ready to be used. 

Wednesday, December 18, 2013

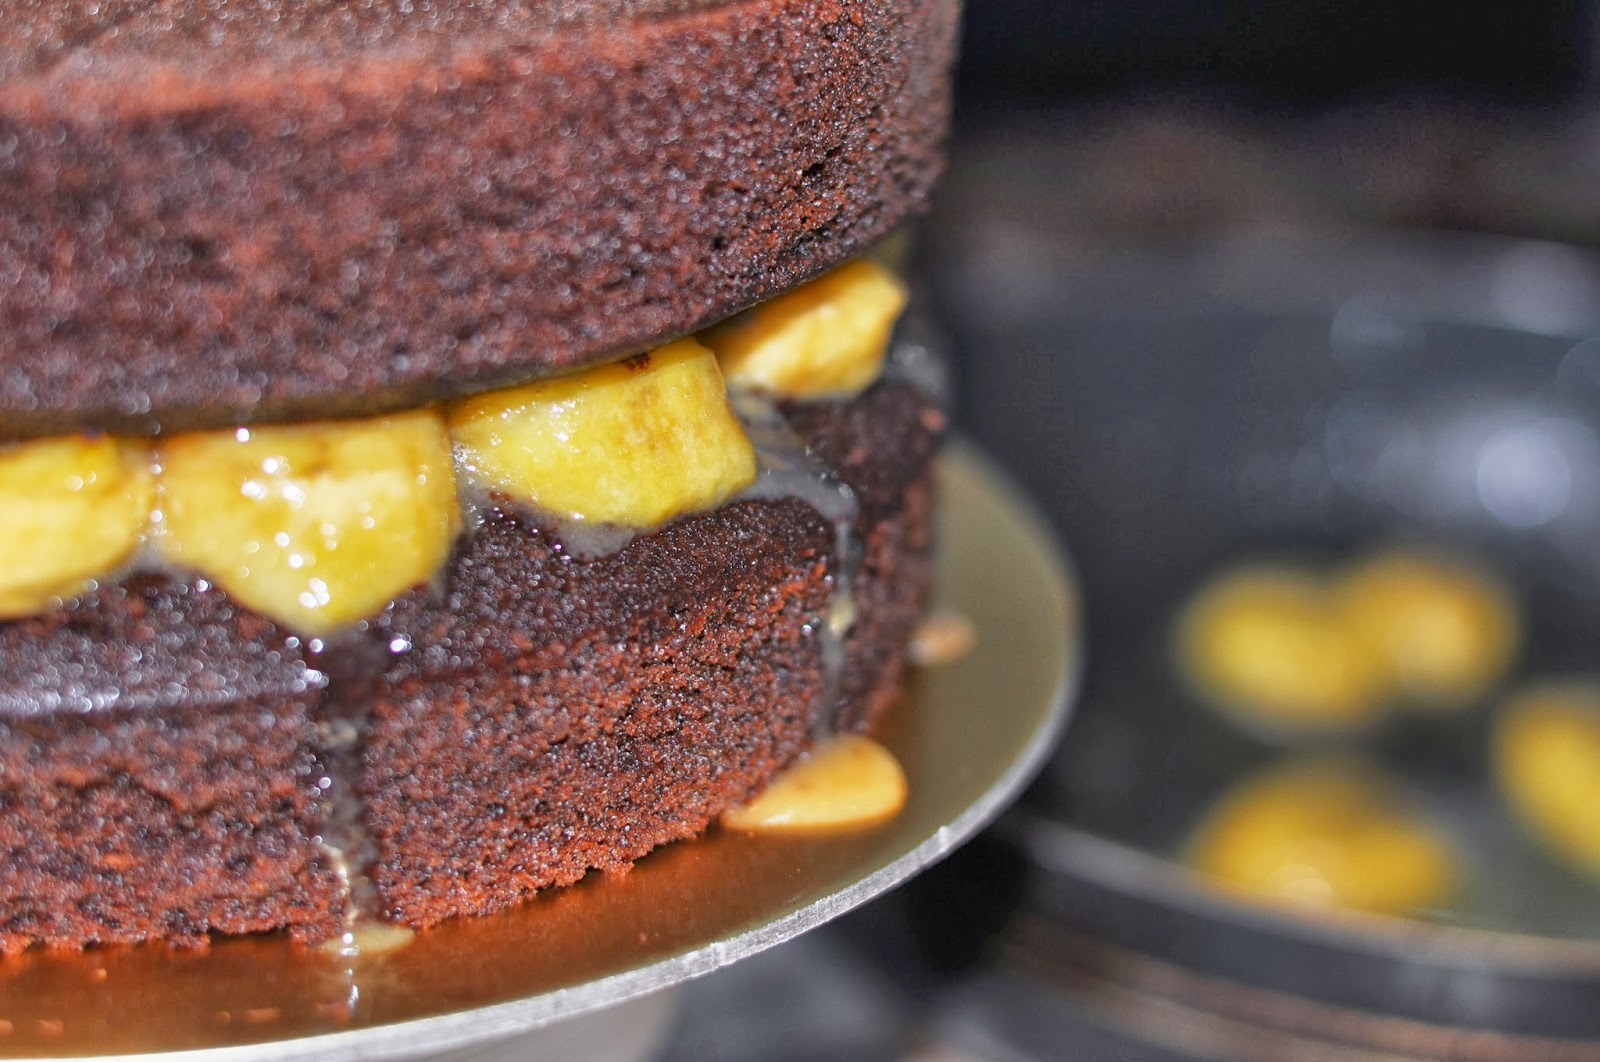
Chocolate Banana Pictorial Guide

Chocolate Banana is a popular choice for birthday celebrations. It looks like the pairing of sweet ripe bananas and a moist dense chocolate cake is good for all ages. Since I've started selling my bakes in late October, this is by far my most ordered cake or cupcakes! Like to really thank everyone for the support by providing a pictorial guide to assembling this cake. You can use this as a loose guide in making a lovely cake for your loved ones and you could also use your own favorite chocolate cake and frosting recipes.

Step 1 -Bake the cakes

I used my favourite chocolate cake recipe, from the Pioneer Woman! It's an easy, fuss-free recipe, I will usually also whip up a batch of cupcakes, everyone loves a hidden banana, not so hidden now but will be covered by a frosting swirl later. 


Chocolate Cake
Ingredients:
227g unsalted butter
4 heaped tablespoons cocoa powder
1 cup boiling water
2 cups All-Purpose flour
11/2 cups fine-grained white sugar (300g)
1/4 teaspoon fine seasalt
165ml buttermilk (Which I sub for 150ml Meiji Milk and 15ml of lemon juice, let stand for 10minutes)
2 large eggs
1 teaspoon baking soda
1 teaspoon vanilla essence

Pre-heat oven to 175C, top-bottom.

Steps:
1. Melt the butter in a large saucepan over medium fire. Swirl it constantly, until it reaches a slightly browned stage.
2. Add the cocoa powder and let it melt within the butter. This would start to look very thick.
3. Add the boiling water and stir to combine. Let it come to a boil and boil for about 30seconds. Remove from the heat and let it cool slightly while you prepare the rest of the ingredients.
4. In a large bowl, combine the flour, sugar and salt and whisk to combine and aerate it slightly.
5. In a measuring cup, measure out the buttermilk, add the eggs and vanilla essence, stir to combine.
6. Add the cocoa mixture to the flour mixture, stirring quickly and thoroughly to let it come together into a  thick, sticky paste.
7. Add the baking soda to the buttermilk mixture, stir briefly and pour everything into the cocoa-flour paste. Stir vigorously to combine the mixtures and it will become a pretty liquid batter.
8.1. For cupcakes, spoon them into cupcakes cases, drop a sliced banana chunk into each cup if you'd like and bake them for 18 to 19 minutes, turning the pan around at 13 minutes.

8.2. For whole cakes, I prefer to do 1.25 portion of above recipe, divide them equally into 2 lined 8-inch pans, and baked for 40 minutes. I've tried 1 portion and 1.5 portion size before, I find 1.25x just the right height after slicing off the slight domed top.

It's a very tender cake, so cool them totally before removing it from the pan and be very careful at it or they may break into pieces.

Step 2 -Level the top of the cakes

I used 6 satay sticks and stick them in all around the cake at an even height from the bottom up. Place a serrated knife on 2 sticks at a time and gently slice into the cake, moving from stick to stick until the cake has been sliced in round the circumference. Remove all the sticks if they had not already fallen out by now, and slice through the center. Remove the sliced tops and go ahead, eat 'em all up, they are frequently the best parts of a cake!


Step 3 - Make Butterscotch Sauce and Cook the Bananas

This step is pretty optional. You can just use riped, sliced bananas and sandwich the cake layers together with the frosting of your choice. I like to use butterscotch sauce as it lends a buttery fragrance to the bananas which also releases their aroma upon cooking. The sauce is also thick and sticky enough to act as the glue between the cake layers. 


I usually use a large plate which is similar to the size of the cake and cut enough bananas to cover the plate as an estimate for the amount of banana slices needed. Note that they will shrink a little upon cooking so do have some extra on hand. They turned a beautiful bright yellow after cooking.

Butterscotch sauce:
180g thickened cream
160g brown sugar
150g unsalted butter
1 tsp vanilla extract
1/2 teaspoon sea salt

Place all ingredients in a pot and bring to boil. Simmer at low heat for around 5 minutes, constantly stirring the mixture until it thickens. 


This will make a large batch. Leave enough sauce in the pan to cover the amount of sliced bananas (Approx. half cup) and keep the rest in a jar to cool and keep for up to 2 weeks in the fridge. Place thickly-cut bananas into the sauce and simmer, flip over, simmer until the bananas just turned slightly soft. This should take a couple of minutes only. Do not cook them for very long or they may become too mushy. 

Step 4 - Sandwich the cake layers with the butterscotch bananas. 

Place 1 cake layer on the actual serving cake board, leveled side facing upwards. Arrange the cooked banana slices on top, placing them close together so every bite yields a large mouth of bananas. 


Next, drizzle the remaining sauce over the bananas. 


Lastly, place the 2nd cake layer, bottom facing up onto the banana slices. Press the cake down firmly to stick it to the sauce. 


Now, leave the cake in the fridge for the butterscotch and bananas to cool and the cakes to stick together. Ooh look at how the sauce dripped and pooled. A sticky sweet mess. 


Step 5 - Frost the cake with Chocolate Swiss Meringue Buttercream (SMB)

Once the cake has sat in the fridge for around 1 hour which will have the cake layers and bananas stuck together quite nicely, the frosting can go on. I always try to make a large batch of SMB so that whenever I need them, I take the amount needed from the freezer, defrost in the fridge overnight and whip to a smooth cream before using. 1 batch of SMB (5 egg white) can make around 2 8-inch or 40 cupcakes. However, if the middle of the cake uses SMB instead of butterscotch, then 5 egg white would only be enough for 1 cake with a little left over. 

Chocolate Swiss Meringue Buttercream 
5 large egg whites
250g granulated sugar
340g unsalted butter, softened and cut into cubes
2 teaspoons vanilla bean paste or essence
pinch of salt
200g melted and cool dark chocolate

Steps:
1. Place egg whites and sugar in a clean and dry metal mixer bowl, and simmer over a pot of water (not boiling), whisking constantly but gently until the sugar has completely dissolved and the egg whites are hot.
2. Using the whisk attachment of mixer, immediately start whipping until the meringue is thick and glossy. The mixture should be at room temperature by now (It may take around 10 minutes)
3. Switch over to paddle attachment and on low speed, start to add butter cubes gradually, and mix until it has reached a silky smooth texture. Add vanilla, salt and melted chocolate. Continue to beat on low speed until well combined.


Before frosting the cake, do place little pieces of aluminium foil or baking paper beneath the cake, just slightly tuck them under the circumference of the cake and make sure it covers the cake board. This is so that any excess cream will drop onto the foil and can be easily pulled out after the cake is frosted, leaving the cake board clean. I find that easier than trying to wipe the board clean thereafter which still usually leaves it looking oily. (Note: do not use kitchen towels as they get soaked and sticks under the cake.. you don't want guests biting into pieces of leftover kitchen towel! eeeui)

Place the cakes on a turntable (Ikea has the best reasonably-priced ones, at $19.90 and is a good size!) and frost away! For a good video tutorial, check out my absolute favourite lady "Sweetapolita.com". She's superb with frosting and has so many good and creative ideas! I've used a number of her recipes and they have all been easy to follow, with good results. 

Once done, leave the cake in the fridge again to set for another hour. 

Step 6 - Finishing Chocolate Glaze

Before putting on the final touch to the cake, start by placing the whole cake in the freezer. As the chocolate glaze has to be slightly warm to be pourable, the cake has to be frozen so that the buttercream would not melt on contact with the glaze. For cupcakes, I will freeze them for 15 minutes and for whole cakes, half an hour at least. Meanwhile, make the glaze!

Chocolate Glaze:

Ingredients:
50g dark chocolate, chopped into pieces (I used 70% cocoa)
100ml heavy cream

Steps:
1. Simply melt the dark chocolate and cream together in a bowl set over simmering water. Do not let any water or vapor get into this mixture. 
2. Cool slightly to a temperature just warm to the touch and use immediately.  
3. Pour the glaze generously over the top of the cake until they reach the circumference and gently nudge the glaze so that it glides over the side. 
4. Place it back into the fridge to set for the last time, until time to serve. 

It's best to remove the cake from the fridge for around 20 minutes to let the buttercream and cake soften a little as they can be a little hard when too cold. 


Monday, November 25, 2013

Chocolate Sponge Cake with Butterscotch Popcorn, Walnuts and Honey Flakes

Hands up! Who loves Garrett's Pop Corn?

10000 hands out of 10001 will probably be raised. Me.. I was never a popcorn fan, with my teenage movie dates subjected to soggy (aka Lao Hong) popcorn, limited to either sweet or salty in flavors. So, when Mr. G. popcorn appeared in the Singapore scene, I was not interested. Total L.A.G.G.A.R.D that I was, it was probably 1 year or so later when I had my first bite at a friend's place. Man.... I fell in love. Those caramel-coated macadamia nuts, the how-does-it-stay-so-crispy popcorn are simply finger licking additive, as most people and the long queues can attest to.

That was the inspiration for this post. I love having textures in my cakes, especially a crispy layer to accompany a soft and moist cake. What better way than to have a bite of cake with a mouthful of crispy popcorn, nuts and cereal. I wanted the crisps to be the highlight of the cake, therefore piling them high up on the cake which tantalises the eyes in addition to sweetening the tongue. Indeed, I thought the look was pretty appetizing, with layers of chocolate whipped cream and a glaze seemingly oozing from the nutty mix.


However, my thoughts didn't literally translate into reality. I popped the buttered popcorn, mixed them with a generous portion of walnuts and cornflakes, coated them with a light layer of butterscotch sauce and sent them into the oven to bake for 20 minutes. To the top of my chocolate sponge cake they went, piled high like a crown.

The nuts and flakes baked to a golden crisp beautifully.. crunchy and aromatic. The popcorn was another story; still as listless as the usual microwaved popcorn, in other words, kinda Lao Hong. My first foray into the world of corn didn't pop.. but oh well this experiment tells me that walnuts and cornflakes go beautifully together. I'm already envisaging another cake, maybe a salted caramel cake, with caramel-coated walnuts and corn flakes.

Chocolate Sponge Cake (Source)
3 Eggs
75g sugar
45g cake flour
10g cocoa powder
pinch of salt
30ml warm whipping cream (microwave high at 20s)

Oven 180C, 2x6inch cake pan, lined on bottom. 

Steps:
1. Sift cake flour, cocoa powder and salt together
2. Whisk eggs in a mixer on high speed until it lightens in colour.
3. Add the sugar to the egg mixture and mix on high speed until it reaches the thick ribbon stage (Where the batter will flow from the beater in a thick lava layer)
4. Add the flour into the egg-sugar mix and fold in to just combine. 
5. Take 1/4 of this mixture and stir into the warm whipped cream. 
6. Pour the whipped cream mixture into the rest of the batter and fold to combine 
7. Pour into pan, tap on the counter to remove air bubbles and bake for 18 - 20 minutes, when the top is slightly browned and spring back to your touch. Cool completely. 

Chocolate Whipped Cream
300ml heavy cream
1/4 cup sifted icing sugar
100g melted and cooled dark chocolate

Steps:
1. Place the mixing bowl and beater into the freezer 15minutes before whipping the cream. (This helps to accelerate the whipping process and prevent curdling)
2. Whip heavy cream on high speed until it reaches a creamy state
3. Add the icing sugar and mix on high speed until it is stiff and in a whipped state
4. Add the cool chocolate and gently beat in on low speed until it's incorporated (Alternatively, fold the chocolate in but be careful not to let the cream curdle)
5. Keep in fridge until ready to frost the cake

Chocolate Glaze 
Ingredients:
50g dark chocolate, chopped into pieces (I used 70% cocoa)
100ml heavy cream


Steps:
Simply melt the dark chocolate and cream together in a bowl set over simmering water. Do not let any water or vapor get into this mixture. Cool slightly to a temperature just warm to the touch and use immediately.  

Walnuts-Popcorn-Cornflake Mix
Ingredients:
1 cup of popped popcorn
A fist of walnuts
1/2 cup of honey cornflakes (I used Nestle Honey Flakes)
1/4 cup of butterscotch sauce

Steps:
1. Pop the popcorn and let it cool slightly
2. Mix the popcorn, walnuts and cornflakes together and coat them with butterscotch sauce
3. Bake at 175C for 20 minutes but stir occasionally to prevent burning
Note: My popcorn didn't turn crispy so I would suggest to omit the popcorn or trial and error other ways of making them crunch.

Assembly of Cake
1. Sandwich a layer of chocolate whipped cream between the 2 layers of sponge.
2. Frost the outside of cake with the chocolate whipped cream and leave in the fridge for an hour to set. 
3. Before pouring the chocolate glaze, freeze the cake for 15minutes to prevent the chocolate glaze from melting the cream. When ready to pour, remove the cake from the freezer and pour the slightly warm chocolate glaze over the top, nudging the sauce around the edge of the cake to let it flow over. 
4. Pile the nut-mix on top of the cake and chill the cake for another 30minutes to let the glaze set. 

Serve slightly chilled. 

Friday, October 25, 2013

Pioneer Woman's Chocolate Sheet Cake in cupcakes again!

Yay my first cupcake bake sale happened! A very nice and trusting friend got me to bake cupcakes for her twins' birthday celebration. Using my go-to chocolate cupcakes recipe now, by the Pioneer Woman, I made chocolate cupcakes, frosted with a choice of peanut butter or chocolate buttercream, topped with a dark chocolate glaze and adorned with a chocolate piece. Yum Yum. 

Recipe can be found at :
Cupcake:
Swiss Meringue Buttercream:
Chocolate Glaze:


Tuesday, October 15, 2013

Decadent Triple Chocolate - Banana Caramel Fudge Cake

When you combine chocolate and banana, you generally want a sweet and probably dense cake. Something that will melt in your mouth amidst a flurry of flavors, a sweet treat cloaked in decadence, a piece that warrants 20 minutes in the gym. At least, that's what I would love, 2 layers of fat fudgy cake, sandwiched with thick bananas cooked in a caramel sauce, coated with a sinful chocolate buttercream and finally, glazed with coat of dark chocolate sauce. Apparently, my friends love them too!

Chocolate Fudge Cake (2 tall 6 inch layers)
Ingredients:
200ml heavy cream
40ml apple cider vinegar
250g cake flour
120g cocoa powder (I used a mix of Valrhona and Lindt)
1 teaspoon (heaped) salt 
1 teaspoon (flat) baking soda
1 teaspoon (flat) baking powder
250g brown sugar
60g unsalted butter, melted and cool 
60g plain thick yogurt
1 cup hot water
2 teaspoon vanilla extract
3 large eggs, lightly beaten

Oven Temp: 175C.

Steps:
1. Combine heavy cream and apple cider vinegar and stir together. It will become very creamy. 
2. Combine all dry ingredients together in a mixing bowl and whisk to combine thoroughly.
3. Add all liquid ingredients except the eggs and beat at medium speed  until just combined. Add the eggs and beat for another 2 minutes. 
4. Pour into 2 lined 6-inch pans (for tall layers) or 2 lined 8-inch pans (for shorter layers). 
5. Bake for 50 minutes until skewer test shows only a few moist crumbs and no batter on the stick. 
Notes: The batter is in liquid form so wrap the lined baking tins with an exterior layer of aluminium foil to prevent leakage.

Additional note:
1.5x the recipe above to make 2 tall 8-inch layers, bake for 55 to 60min. (More suitable as a birthday cake size)


Sauteed Banana in Caramel sauce
Ingredients:
2 large or 3 medium bananas, sliced into thick pieces
1/2 cup heavy cream
1/4 cup brown sugar
50g unsalted butter
1 teaspoon vanilla bean paste

Steps:
1. In a large pan, place heavy cream, brown sugar and butter together and melt over medium heat. 
2. Once melted, mix in the vanilla bean paste. 
3. Place sliced bananas into the pan and cook over medium fire. Swirl the pan gently to cook the bananas in the sauce for 2 to 3 minutes, until bananas softened slightly and has absorbed the flavor of the caramel. 
Note: After using the bananas and some of the sauce, there will still be leftover sauce. Cool to room temperature and keep in refrigerator for future use.


Chocolate Swiss Meringue Buttercream 
5 large egg whites
250g granulated sugar
340g unsalted butter, softened and cut into cubes
2 teaspoons vanilla bean paste or essence
pinch of salt
200g melted and cool dark chocolate

Steps:
1. Place egg whites and sugar in a clean and dry metal mixer bowl, and simmer over a pot of water (not boiling), whisking constantly but gently until the sugar has completely dissolved and the egg whites are hot.
2. Using the whisk attachment of mixer, immediately start whipping until the meringue is thick and glossy. The mixture should be at room temperature by now (It may take around 10 minutes)
3. Switch over to paddle attachment and on low speed, start to add butter cubes gradually, and mix until it has reached a silky smooth texture. Add vanilla, salt and melted chocolate. Continue to beat on low speed until well combined.

Chocolate Glaze 
Ingredients:
50g dark chocolate, chopped into pieces (I used 70% cocoa)
100ml heavy cream

Steps:
Simply melt the dark chocolate and cream together in a bowl set over simmering water. Do not let any water or vapor get into this mixture. Cool slightly to a temperature just warm to the touch and use immediately.  

Assembly
1. Slice off the top of the cooled cake layers to create a flat top on each. 
2. Place 1 layer (bottom facing down) on a serving plate, arrange cooked sliced bananas on the top, pour some sauce over the bananas and place the 2nd layer of cake (bottom facing up) on top. 
3. Place cake in the fridge to chill for an hour or when the cake is no longer warm with the banana caramel. 
4. Frost cake with buttercream and chill for another hour or when the buttercream is cold and set. 
5. Pour chocolate glaze over the top and nudge the sides to let some sauce flow over the edges. 
Note: Freeze the cake for 15 minutes before pouring the chocolate glaze over. This will prevent the buttercream from melting from the slightly warm glaze. 
6. Place back in fridge. Remove cake from refrigerator for 20 to 30 minutes before serving as cake will be too dense and heavy if eaten chilled from the fridge directly. 


Thursday, October 10, 2013

Orange Chocolate Sponge Cake

I've done approximately 3 sponge cakes before and none has so far been very successful, with each in varying stages of dryness and frequently taste very heavily of eggs. I've then bookmarked many sponge cake recipes in search of a soft and moist sponge cake which also rises well. I dare say I seemed to have found it at Daily Delicious! 

This sponge cake recipe uses a little heavy cream in addition to the usual suspects of eggs, flour and sugar. It's a rather easy - to - make cake which takes only about 15 minutes to mix and maximum 30 minutes to bake. The toughest step is lining the pan! I really dislike the cumbersome actions of cutting little rounds and long strips and pasting them into the pans with a little bit of whichever batter or dough of the day. However, I guess that still beats scrubbing, scrubbing and scrubbing of unlined pans with the leftover crumbs. 

The only change I did was to add the zest of an orange as I think they may help supersede the strong egg-taste of sponge cakes. The resulting bake was a lovely, soft and moist sponge cake with a hint of orange, not egg! Yay, its bouncy and light, I could not stop pinching the cut-away strips as I prepare the cake for the mousse layer. Delightful, and I believe I would be baking this alot for all the durian / yam / mango layered cakes of the future while I start on today's composition of a chocolate orange cake!


Sponge Cake Recipe (Source):
4 Eggs
90g sugar
80g cake flour
pinch of salt
40ml warm whipping cream (microwave high at 20s)
Zest of 1 orange

Oven 180C, 8inch cake pan, lined on bottom. 

Steps:
1. Sift cake flour and salt together
2. Whisk eggs in a mixer on high speed until it lightens in colour.
3. Add the sugar to the egg mixture and mix on high speed until it reaches the thick ribbon stage (Where the batter will flow from the beater in a thick lava layer)
4. Add the flour into the egg-sugar mix and fold in to just combine. 
5. Take 1/4 of this mixture and stir into the warm whipped cream. 
6. Pour the whipped cream mixture and orange zest into the rest of the batter and fold to combine 
7. Pour into pan, tap on the counter to remove air bubbles and bake for 25 to 30 minutes, when the top is slightly browned and spring back to your touch. Cool completely. 


Chocolate Swiss Meringue Buttercream 
5 large egg whites
250g granulated sugar
340g unsalted butter, softened and cut into cubes
2 teaspoons vanilla bean paste or essence
pinch of salt
200g melted and cool dark chocolate

Steps:
1. Place egg whites and sugar in a clean and dry metal mixer bowl, and simmer over a pot of water (not boiling), whisking constantly but gently until the sugar has completely dissolved and the egg whites are hot.
2. Using the whisk attachment of mixer, immediately start whipping until the meringue is thick and glossy. The mixture should be at room temperature by now (It may take around 10 minutes)
3. Switch over to paddle attachment and on low speed, start to add butter cubes gradually, and mix until it has reached a silky smooth texture. Add vanilla, salt and melted chocolate. Continue to beat on low speed until well combined.

Chocolate Mousse Coating (Source)
170g chocolate
85g unsalted butter
4 egg yolks
3 tablespoons sugar
1 teaspoon vanilla extract
1 cup heavy cream

Steps:
1. Melt the chocolate and butter in a bowl set over simmering water. (Do not let any water get into this mixture). Remove chocolate from heat. 
2. Combine egg yolks and sugar in another bowl and set over simmering water. Whisk for around 5 minutes until it turns pale. Remove from heat. 
3. Stir the chocolate mixture into the egg mixture. Add vanilla and mix well. It should be a smooth mixture. If it turns grainy, whisk in a small amount of cream and stir until smooth. Cool to room temperature. 
4. Whip the heavy cream to soft peaks. Mix 1/4 of the cream into the chocolate-egg mixture. Fold in the rest of the whipped cream. 

Assembly of cake:
1. Cut away a slim perimeter of the cake and slice the cake horizontally in half. 
2. Place 1 layer of the cake back into an 8-inch pan and spread the chocolate buttercream in a thick layer.
3. Cover with the 2nd layer of the cake. 
4. Pour the chocolate mousse over the cake until it completely covers the top. 
Chill in the refrigerator for at least 2 hours to set before serving. 

Unfortunately, I didn't have enough mousse to cover the cake as I cut away too much of the cake perimeter! With insufficient mousse, I tried to use it as a glaze instead, covering up all the edge however, they are too thin a layer and the jagged edges of the cut cake peeked through, resulting in a really bad looking side of the cake. oh well..lesson learned, and my friends love the cake!